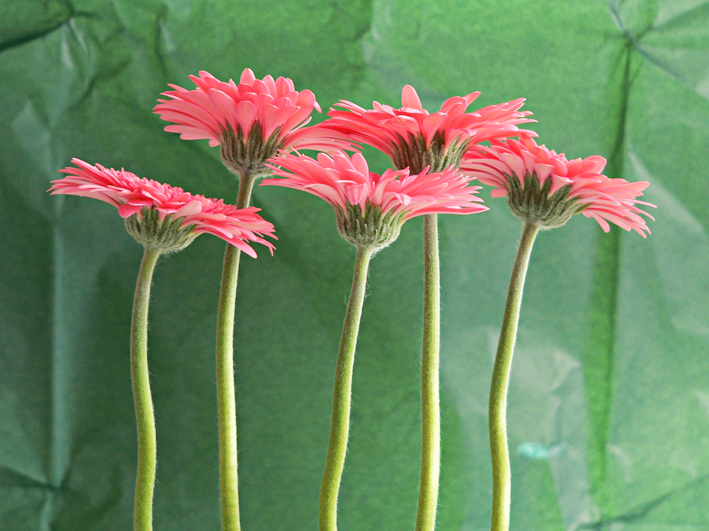
Gerbera study – acrylic on card, 200 x 280 mm, 2013.Gerbera study, detail.
I’ve been experimenting with my new paints… and I’m in love with quinacridone magenta!
Today’s Shoot it, Sketch it is all about colour and texture. The subject is something I sketched a few years ago (see below). The original photo is even older (2004 is not a typo). Just for fun, I used the sketch of the photo (rather than the photo) as my reference.
Original watercolour sketch, 2010.Original photo, 2004.
Straven Road, 2013.Straven Road, original photo – Christchurch, 2013.
Last week, I had one of those ‘so that’s how they do it’ moments. I read about a clever piece of kit called a tilt-shift lens (used by photographers to control the way perspective appears in an image) and a way of mimicking the lens in Photoshop. With the right photo, you can digitally blur and manipulate it to make places and people look like miniatures. Even without the right photo, it’s still an interesting effect.
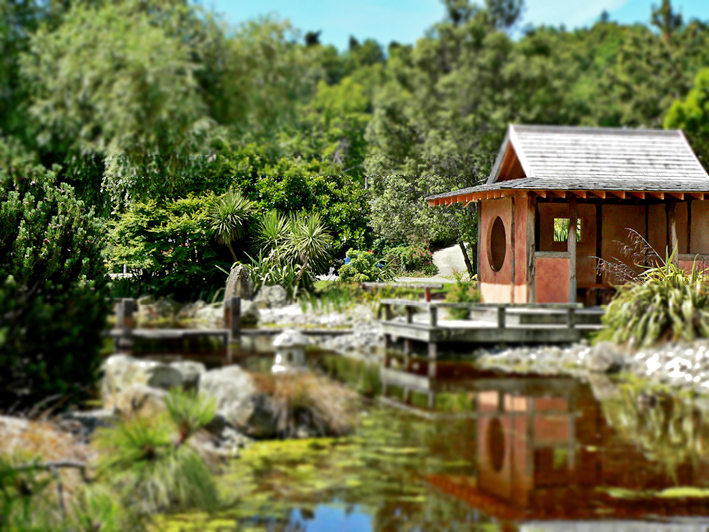
Miyazu Garden, 2013.Miyazu Garden, original photo – Nelson, 2011.
The latest version of Photoshop apparently has a ‘tilt shift’ blur feature but, really, it’s pretty straightforward: apply a reflected gradient and a lens blur so that parts of the image are out of focus, then adjust saturation and contrast to make the colours look more artificial.
The effect tends to work best with photos of people/vehicles/buildings taken from an elevated viewpoint. You don’t have to hire a helicopter to get a suitable photo… but climbing several flights of stairs to get just a little bit higher could make all the difference. With that in mind, I’m now on the hunt for really good photos to miniaturise : )
My thanks to Hovercraftdoggy for their inspirational We make models post (which includes a link to a tilt-shift photography Photoshop tutorial).
Blue (seagull #2) – mixed media, 205 x 290 mm, 2013
Seagull #2 – Akaroa, 2012
I hope you like this week’s Shoot it, Sketch it. The water and the seagull standing on the wall are two different paintings that have been combined in Photoshop. The gull was sketched in graphite and then painted using acrylics thinned with a gloss medium. The background and wall are thicker acrylics that have been applied with a palette knife.
You’ll be seeing a few more paintings over the next month as I come to terms with my new artists’ acrylics and the knowledge that I’ve just accepted a commission to do a large peony rose on stretched canvas! I do love a challenge : )
This week’s Shoot it, Sketch it photograph was taken around the corner from our house last autumn. You can just make out the curve of the little footbridge in the blurry distance. Is it just me or does the light shining through the willows look like fairylights?
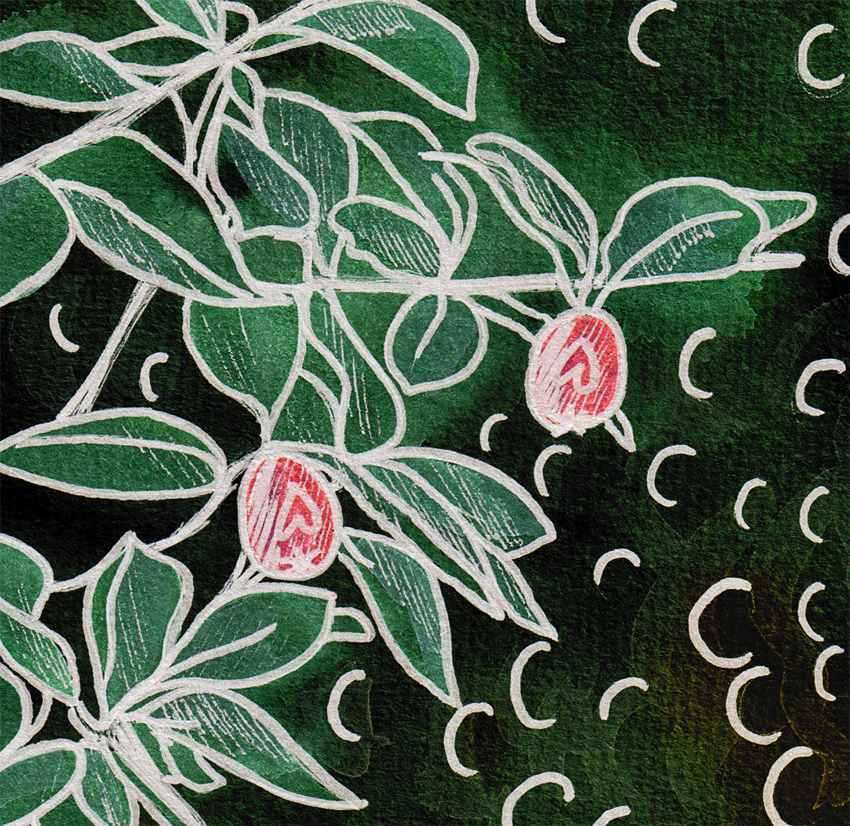
Smartlea Street Bridge – ink, watercolour and digital, 215 x 175 mm, 2013.
Smartlea Street Bridge, detail – ink, watercolour and digital, 2013.
The short story ~ the sketch is an ink and watercolour painting that has been altered using a kind of digital-resist effect (a combination of Photoshop filters that mimic the wax-resist technique used in making batik).
The long story ~ I’m going through an experimental phase. I’m curious to see what happens when I venture out of my comfort zone (ink drawings with lots of fiddly details and carefully considered watercolour and acrylic paintings) — I want to explore different ways of seeing things and be less concerned about the end result. What if…? That’s what happened in A trip down memory lane and it’s what happened here. Smartlea Street Bridge began as an ink and watercolour sketch which I then drew over with a brush pen to thicken the lines and make some areas inky black. The final image was created in Photoshop by inverting a scanned copy of the painting and applying various filters. The batik effect was discovered through trial and error.
Being out of my comfort zone does have one little drawback — it’s not very comfortable. I’m having to resist the urge to edit the light and dark areas to make them look more like the original photo. But so far, so good…